Unit
01 - Treasure Hunt
1. Treasure Hunt
2. Modelled Questions
3. Sorting and Classifying
1.
Treasure Hunt
This activity encourages students to formulate acute observations.
The use of images of the excursion site provides a shared prior experience,
a focus for observation and discussion, and a stimulus for students
who are sometimes disinterested or difficult to engage in school activities.
This includes, but is not limited to, students with disabilities as
it helps to ‘set the scene’ for them before the excursion.
The display of images, which students are able to revisit, makes the
learning visible to parents.
Materials needed
- Digital
or conventional camera
- Tripod (useful)
- Video camera (useful)
- Choose an excursion site
Before the excursion
Visit the site on your own. Take
photographs or movies of plants, animals,
fungi and rocks at the site. Try to capture different shaped features,
the patterns of light and shade and contrasting colours. To prepare
them for class use, develop or print the images and laminate them. Alternatively
make the images into a slideshow to exhibit on your classroom computer.
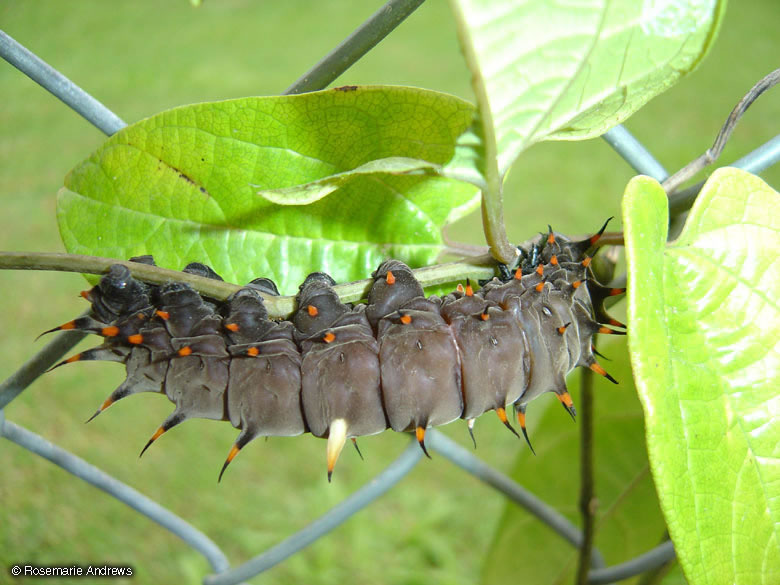
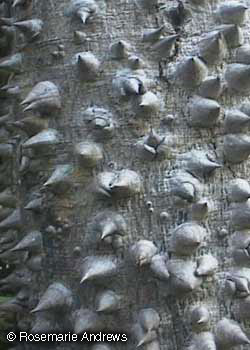
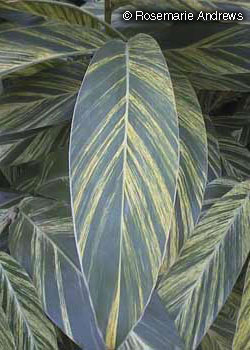
Crop and enlarge some of the images so that only one detail is recognisable
(leaves, roots, bark, trunks, flowers, a butterfly wing, the underside
of a caterpillar or part of a tree trunk). Display
the images around the classroom at
eye level and/or keep the slide show available on the computer.
Examples of cropped images
|
|
|
Birdwing Caterpillar |
Bombax |
Leaf |
Use the images to extend vocabulary and comprehension. One way to
do this is to scribe the students’ ideas as they talk, supplying
the ‘correct’ terminology so they start to build up a scientific
vocabulary and a common language.
The display makes the learning visible to parents and students are
able to revisit them frequently. This is a particularly useful strategy
when working with students with disabilities as it helps to ‘set the
scene’ for them before the excursion.
Class discussion
As a class, look at the images and talk about them. The purpose of producing
a set of images from your pre-excursion visit is to introduce different
features to students and encourage their own observations.
Discussion-starting questions:
- What do you think this is?
- What does it remind
you of?
- What does it look like?
- Where do you think you might find this?
- Describe the colours/shapes
you can see?
- Have you seen anything like this before?
- Do you think this is important
to the rainforest?
Developing concepts of comparison:
- How is it the same?
- How is it different?
- Do you think it is from
the same place?
Make a book
Make a book
containing the images. Students can refer to the book before, during
and after the excursion, for discussion, drawing and comparison.
Making the book available to parents includes them in the classroom
activities.
On the excursion
Take the book with
you on the rainforest excursion. Show the images one at a time and
ask the students to find this feature in the forest. When the students
find the feature ask them to engage their senses by looking, touching,
smelling and observing.
The following questions can be used to encourage students to engage
their senses:
- Is this what you thought it would look like?
- How
is it the same?
- How is it different?
- Have you seen this anywhere
else?
2.
Modelled Questions
Young students often find formulating questions difficult. They want
to provide a statement or ask closed questions which require only one
correct answer, such as: What is it? Where does it live? What colour
is it?
Young students need explicit teaching and modelling of how to ask questions
or how to pose problems. It is time well spent as it provides a basis
for investigation, exploration and lifelong learning.
Conduct lessons on how to ask open-ended questions. Model the thinking
process behind formulating a question and answering it. For example:
- I need to find out about...
- What sort of things
can I ask?
- Who can I ask?
- Where can I look to find the answer?
- How can
I check if it is right?
- What if I need to get more information?
- What
if the information is different to what I had already heard?
Some question templates
- I
wonder what would happen if…?
- Why do you think this is necessary
to the rainforest?
- I wonder why/how…?
- What do you think about…?
- How do you think
it can survive there?
- Why do you think this happens?
- What if...?
- We have a problem here I wonder what
we can do to solve it?
Before the excursion
The following focus questions encourage active exploration:
- What do you think you will see when we get there?
- What
would you like to see?
- Do you think that we will see that?
Elicit questions from the students. This gives them an opportunity
to make decisions about the direction of their learning as well as
letting them see the variety of questions which can be generated
depending on the purpose of the questioner.
On the excursion
Refer to the answers from the above questions (the focus and the
student generated questions).
After the excursion
Repeat the above activity.
3.
Sorting and Classifying
Students extend and practice their vocabulary by describing attributes
of living and non-living things. Don’t be afraid to give the students
the correct terminology for animals, plants and processes. Even very
young students are able to remember, use and understand difficult vocabulary
in context.
Providing students with appropriate vocabulary gives everybody a common
language to use in discussions.
Before the excursion
Students collect leaves, bark, seeds, sticks, stones and dead insects
from the school grounds and home. Ask students to find ways of describing
and classifying their found objects. This encourages them to observe
objects closely and to use appropriate language when describing them.
Model giving a description of objects. This helps students to learn
and use appropriate vocabulary and terminology. Sort by attributes.
For example, sort leaves by:
- shape
- colour
- types of veins
- serrated or non-serrated edges
- Are they compound
or simple leaves?
- Do the leaves have drip
tips? What
purpose do they serve?
Describe seed shape, smell, size, colour and texture. Sort them according
to:
- colour
- shape
- type
- size
- texture.
Create touch boxes for children to focus on texture of the found objects.
Model the vocabulary used to describe how something feels (slimy, sharp,
smooth, furry and crinkly).
Classroom game
"What Am I?" The idea of the game is to guess the object with
as few questions as possible. Model how to describe general and specific
attributes and ask general and specific questions.
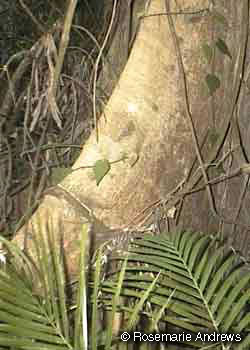
One student chooses an object from the rainforest such as:
|
|
|
A Buttress
Root |
A Vine |
A Leech |
The other students ask questions to determine its attributes.
|