Unit
04 – A Butterfly Garden
A butterfly garden is not a
short term project. At first it requires a significant amount of
work and organisation on the part of the teacher. It may span a
whole year from planning to completion. However, it will bring delight
to the whole school community and providing numerous learning experiences
for all students (and teachers) for many years to come. It will
encourage a change in attitudes towards caterpillars, as without
them there would be no butterflies! Parents, community members and
older students are a wonderful resource and can help with the maintenance.
This combined effort will contribute to the ethos of partnerships
within the school.
1. Before the Garden
2. Establishing the Garden
3. Working with the Garden
4. Investigations
5. Life Cycle
6. Questions
1.
Before the Garden
Discuss with the students the importance of the project, the information
they can learn and the pleasure they will gain. If the students understand
this, they will be more committed to establishing and maintaining the
garden, and observing and investigating the butterflies.
2.
Establishing the Garden
Preparing and planning the garden is a complete set of activities including
mathematics, language and literacy, understanding environments, science
and sense of self and others. The students are involved in the whole
process from the beginning, increasing their sense of ownership. The
students help choose plants and seeds, prepare the garden and plant
and care for the seedlings.
Research the butterflies living in your local
area
There are many documents available on raising highly visible species
like the Cairns
Birdwing.
There are many other beautiful butterflies, possibly not as big or as
flashy, but all fulfilling an important role in maintaining the biodiversity
of the rainforest and they will provide numerous learning opportunities
for young students. Remember to choose butterflies and moths that are
easy to attract such as Ulysses, Orchard Swallowtail, Blue Triangle,
Australian Rustic and Cairns Birdwing butterflies and the Four O’
Clock Moth
Research which native plants will attract them
Finding the right plants is suitable for a whole class research project.
Packets of seeds for flowering plants are a quick and colourful way
to get started. Discuss the plants that will be used, locate where they
are available. Look at gardening books, magazines, on the internet or
ask at local nurseries. Many local nurseries are more than happy to
help with information about local plants that attract butterflies and
moths. Involve parents and other members of the community, and invite
a speaker to talk to the students. Determine which plants will:
- Take longer to mature
- Grow into large trees
- Be small shrubs
- Be flowering plants.
Remember to choose plant species that are readily available, hardy
and easy to grow, such as Aristolochia tagala, Euodia
elleryana, Scalopia braunii and Adenia
heterophylia.
Price the plants and raise funds
Find out how many plants will be needed and the cost and plan activities
such as an art exhibition, a spellathon, or an obstacle race, to raise
money for the project.
Decide on a suitable area for the garden
Students compare the different plants by making a scale chart of the
adult size of each proposed plant. This will help them to decide where
they should be planted. Smaller plants should be at the edges or the
front, larger plants behind them and vines on a trellis or tree for
support. There should be space between each area for ease of observation.
The students can represent their ideas by drawing, writing a plan or
making a model. Discuss the plans as a class group, sharing ideas until
arriving at a suitable plan. This encourages the students to work collaboratively.
Make a map of the school
grounds. Younger students use collage material, blocks
and other suitable equipment while older students draw or use the computer.
Kid Pix and Microsoft Paint are suitable programs for drawing.
Discuss the needs of the plants, such as amount of sunlight, water,
support and butterflies. The students explore the school grounds and,
using their prior knowledge and their plans for the garden, they can
locate various suitable positions in the grounds. These can then be
discussed as a class until a position that fulfills all criteria is
decided upon.
The students use their graphs, charts, plans and maps to decide on the
final plan of the garden. All of their previous learning is utilised
ensuring all activities are purposeful.
Planting the garden
Students write or illustrate letters of invitation to parents
and other interested adults inviting them to take part in this exciting
project. Have a working bee to prepare the soil so that adults can help
with the heavy moving and digging. Hold a sausage sizzle during the
working bee to raise more funds for the garden.
Tips for the garden
- Use a good quality garden loam and some fertilizer
available at local nurseries.
- If using fertilizers leave the
garden for at least one week before planting to avoid burning
the plants.
- Remember to feed and mulch plants such as citrus on a regular
basis.
- Use a fence, trellis or established tree for vines.
- Keep the plants
ant-free as these are enemies of the caterpillars
- Encourage students
not to bring food near the garden as this will attract ants.
- Remove
green ant nests in the vicinity of the garden.
- Be prepared for caterpillars
to eat the plants.
- Success is not always guaranteed. In the wild only
a small percentage of eggs make it to maturity. Students might
not always see caterpillars on their plants.
3.
Working with the Garden
Maintenance. Make a roster of students and, parents/community
members who will help to maintain the garden. This is important in the
dry months and school holidays and helps to minimise the teachers’
workload.
Draw/ paint /model the plants at various stages. The drawings
are used as part of a chart showing a record of progress. Students draw
and paint outside using clipboards as easels. This enables them to observe
the plants and discuss attributes as they work.
Measure the growth of each plant, recording details
on a graph or chart.
Compare the different plants and their needs such as which plants need
more water, shade, sun and fertiliser. Record findings on a chart or
use photographs.
Match and compare the
leaves. Discuss the different shapes, veins and colours. Use
a strong microscope to observe the structure of the plants.
Write
fact cards.
Make leaf pattern art. Use the pattern of
a leaf taken from an enlarged photograph or by looking through a microscope,
and recreate it on paper. Students repeat the pattern several times
and if desired use two or three colours to fill in some parts of the
pattern, creating an abstract design.
Mix the colours. Use the colours of the
leaves to investigate and mix colours to produce artwork.
Write a report about
the plants.
Brainstorm the needs
of each plant.
4.
Investigations
When butterflies are attracted to the garden and lay eggs there are
many activities that the students can pursue. It is possible to obtain
some caterpillars and/or eggs commercially from tourist attractions
and companies such as the Insect Farm near Innisfail. Do not take Ulysses
or Birdwing caterpillars from another vine, as this is illegal.
Measure and count the eggs
Discuss the eggs:
- Are they able to be spotted easily by predators?
- Are they camouflaged?
- How many are there?
- Are they laid singly or in groups?
- How many actually hatch?
Measure and count the caterpillars
It is important not to touch the caterpillars (this is illegal in
the case of Birdwings and Ulysses, as they are protected) but students
can devise ingenious ways of measuring them. Ask questions to guide
student inquiries:
- How will we measure the caterpillars without touching
them or removing them from the plant?
- How will we record the measurement?
- Why do we leave them on the plant?
- What might happen if we touch them?
Observe how much they eat in a day
The students draw or photograph the plant at various times of the
day the results are then compared.
Observe the changes in the caterpillars
- Take
photographs on a daily basis for comparison and record keeping.
- If
the photographs are of high resolution they can be cropped and
enlarged to show the anatomy of the caterpillars in great detail.
- Draw the
changes over a period of time for the same purpose.
- Take short videos
using a digital camera.
- Photographs and videos can be used for a slideshow,
photo or drawing montage.
- Record their growth and changes on a chart
or graph.
- Draw them or make models using collage materials.
- Keep a record of
the time it takes for eggs to hatch and how long before caterpillars
pupate.
- Observe and record the formation of the chrysalis.
- Take photographs
for your diary.
- Discuss metamorphosis and
what is actually happening to the caterpillar.
It is so fascinating and yucky that young students will be intrigued.
- When
the butterflies emerge shoot a video and/or take photographs.
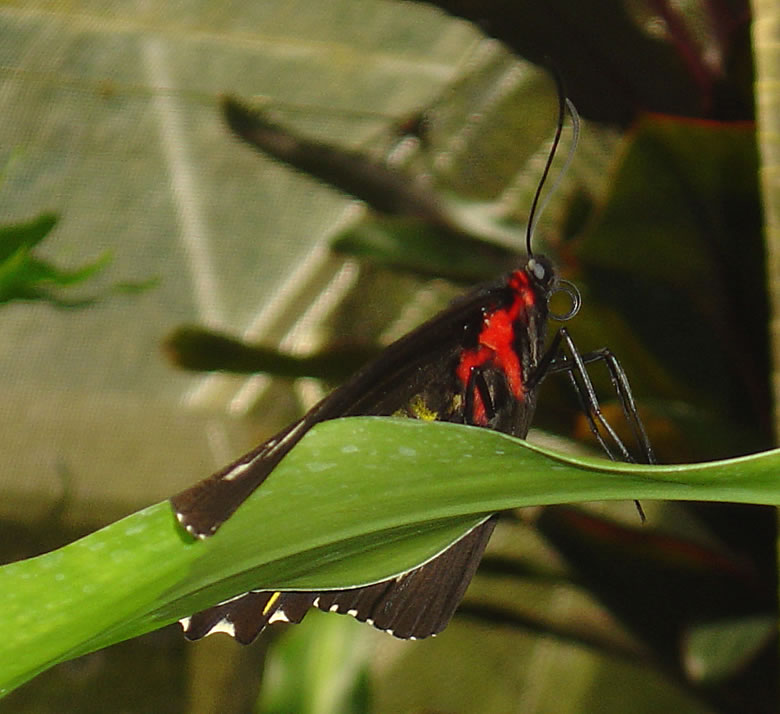
- Observe
the habits of the butterfly. Discuss its feeding, what does it
use to feed, and which flowers does it prefer?

- Hold a Question and Answer Session with
parents or other classes.
Tips
Discourage the students from rushing at the butterflies. Butterflies
operate on the fright and flight principle and by doing this they shed
scales from their wings, thereby shortening their lifespan.
5. Life Cycle
Through observation and research the students can represent the life
cycle in a number
of ways:
- Collage using a wide range of materials
- Report
- Diagram, the students draw the
various stages of the life cycle
- Claymation
- Slideshow using photographs taken over
a period of time
6. Questions
Butterflies and moths live interesting and diverse lives. Questions
generate lively discussion, debate and conversation. Following are some
suggestions for lines of inquiry. Some information is provided in the
linked fact sheets, and other information can be found through a joint
learning process by teachers and students using the library, internet
and experts.
|